
Abstract
These notes focus on the ways an InDesign CS6 file should be arranged in order to be appropriately exported as ePub. Further insights are provided in order to improve quality of the exported ePub in terms of file size, metadata, layout.
Required Knowledge
- Adobe InDesign CS6
- Basic HTML and CSS
1: Premises
1.1: Legend
- Software Command
- Shortcut
- Code Snippet
1.2: Wait, weren’t we supposed to use open source tools?
We all love opes source, but in some cases a pragmatic approach it’s needed: a perspective that takes into account the actual workflow without denying it beforehand. Not every designer would be happy to give up the softwares used for the last five years for the sake of open source.
Developing an EPUB through InDesign could be considered a transitional process, in doing so the designer will anyway acquire a know-how that could be invested in open source tools and procedures.
1.3: So you’re saying that obtaining EPUB from Indesign is not necessarily the best practice…
Exactly, it really depends on the context. This procedure could be useful whether:
- you, or your collaborators, don’t have any HTML or CSS knowledge (but in this case you won’t be able to go through the whole tutorial and this will heavily impact the quality of your final ePub, check 1.4);
- you have an articulated publication already set as an InDesign file;
- you want to convert your backlist to ePub and the books are archived as InDesign packages.
1.4: Is Indesign enough to develop a high quality ePub?
No, it’s not enough. There are strong limitations for ePub development within InDesign, this is because its primary function is to set files for print.
Therefore if you want a high quality ePub you need to tweak the code produced by the software, in order to do so you will need HTML and CSS skills.
1.5: May I use the same structure of the InDesign file for both print and ePub?
Rarely the InDesign file ready for print will work fine to be exported “as is” to ePub. But in case you want to produce an ePub version of the printed ducument, setting the file as follows will save you a lot of work. In this sense this tutorial proposes an ePub-first approach.
1.6: Resources
- “InDesign CS6 to EPUB, Kindle, and iPad” course by Anne-Marie Concepcion on Lynda.com;
- La pratica dell’ePub (The ePub Practice) by Ivan Rachieli, 2011;
- Open Packaging Format (OPF) 2.0.1 v1.0.1 Recommended Specification.
1.7: Softwares
1.8: Attachments
2: General
2.1: No Local Overrides!
This simply means that you should set everything in your document either as a Paragraph Style or a Charachter Style. When you have set one of those and change a setting locally a plus sign (+) appears next to the name of the syle. You should avoid this because it would heavily affect the cleanness of the ePub code.
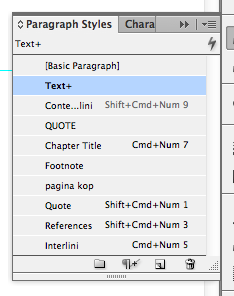
The Paragraph Styles panel
2.2: Use Master Pages
Keep all the repeating elements such as title, page number, article title in Master pages. In this way they won’t be rendered in the ePub.
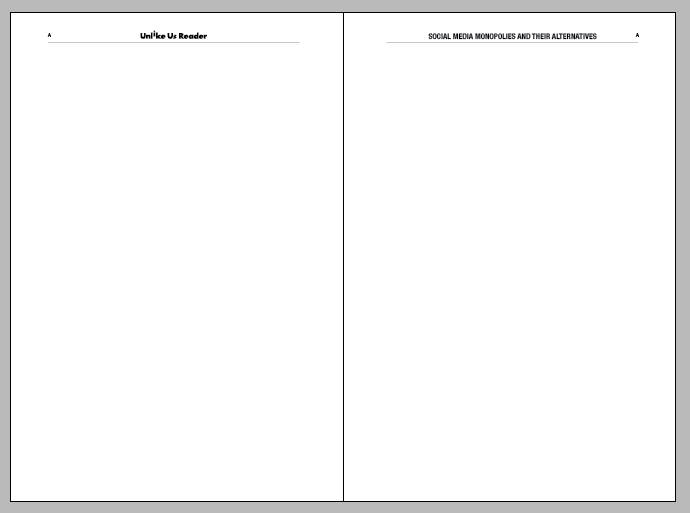
Example of master page
2.3: Paragraph Means Paragraph
Don’t use paragraph breaks to space elements, use instead the bounding box itself.
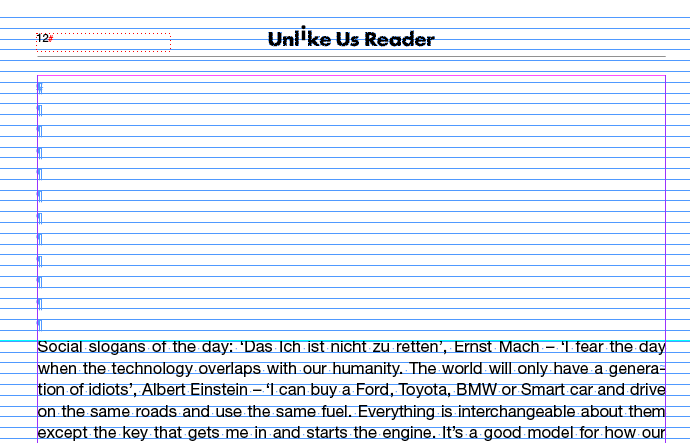
Wrong use of paragraphs
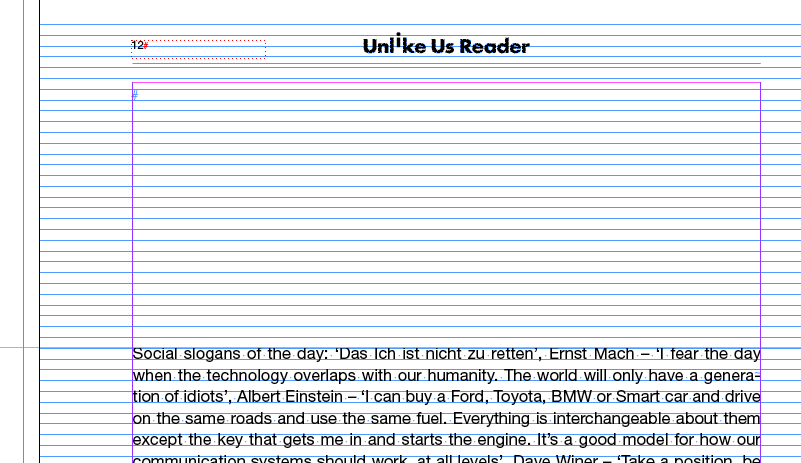
Correct use of paragraphs
2.4: Paragraph Really Means Paragraph
Use the Space After feature in the Paragraph Style instead of a double paragraph break, except in the case of colophon and exceptional layouts.
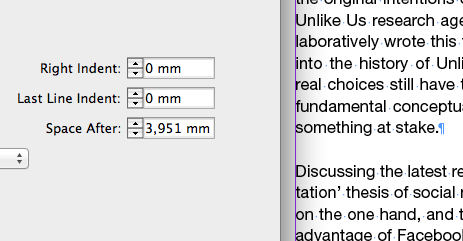
Paragraphs spaced via Space After
2.5: Paragraph = Paragraph
Use soft returns (Shift+Return) instead of paragraph breaks (Return) when you work on the visual appearance of text. A paragraph break could cause problems in a reflowable context, while the soft returns could be automatically stripped out when exporting.
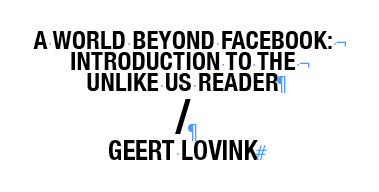
Soft returns used to break the title for visual purposes.
2.6: ALL CAPS hide Actual Caps
Even if you have an ALL CAPS setting remember to use Capitals when you write the text: it may happen that in the ePub version the setting is ignored, the result would be for instance a lowercase title.
2.7: Letters Aren’t Meant to be Stretched
Do not use Vertical Scale to adjust the paragraphs (for instance when you have a single word going to the next line), use instead the Justification settings in the Paragraph Style.
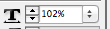
Vertical Scale setting
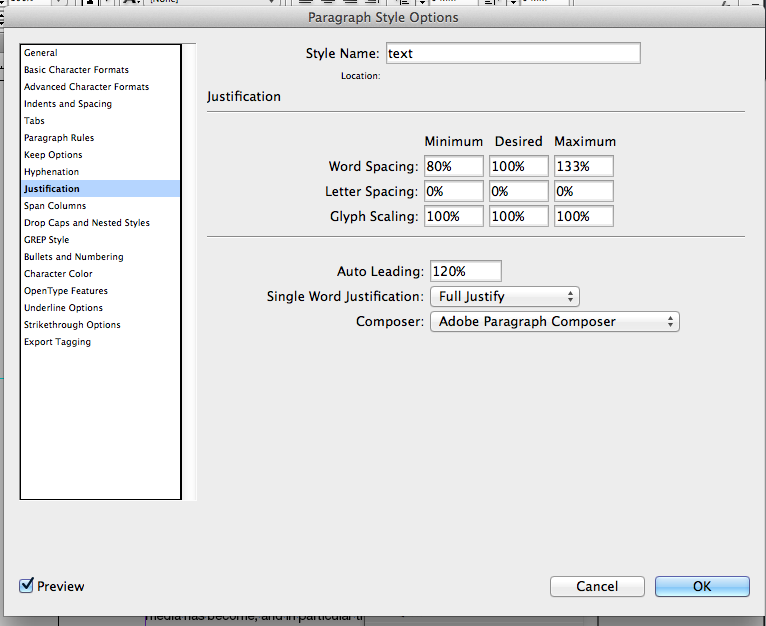
Justification settings in the Paragraph Style
2.8: Fonts
Embed a font only if you consider it necessary. On some devices only the headings’ fonts will be preserved. Also, only the fonts licensed for “e-use will” be actually embedded by InDesign, therefore if you want to embed a font make sure you own the license. An OpenType font is preferrable.
In order to embed fonts just check Include Embeddable Fonts from the EPUB Export Options (Cmd+E).
Include Embeddable Fonts checked in the EPUB Export Options
2.9: Export Early, Export Often
You can find the export option from File > Export (or Cmd+E). Of course you need to choose EPUB as the resulting format. A detail explanation of all the options available can be found at 9.1.
2.10: How do I open an EPUB file?
There are several softwares and online applications available. Among the most used there are Calibre and Adobe Digital Editions.
3: Cover and Images
3.1: Formats and Resolution
As we will see afterwards (see 9.3), from InDesign is it possible to export images in 3 formats:
- JPEG
- GIF
- PNG
JPEG could be used in any case, except for images with transparent background (such as logos). In this case PNG is preferable.
150ppi is generally considered to be a good compromise in terms of resolution and file size. File size is important cause it directly affects loading time on limited computing capacity such as mobiles and e-readers.
3.2: Colour Over Greyscale
Consider that your book could be seen on a E Ink device as well as on a tablet, therefore it makes sense to include your images in colours. On an e-reader they will automatically set as greyscale.
3.3: Two Covers?
In InDesign there are 2 choices for including the cover in the EPUB Export Options(Cmd+E):
- Include the cover of your book in the InDesign file as the first page. Consider that in this way, it will be exported as both as cover and first page of the book.
- Choose an image from your computer.
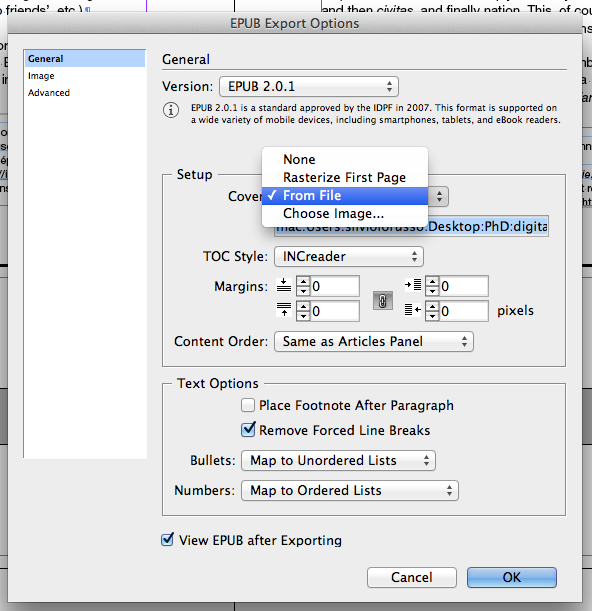
Cover settings in the EPUB Export Options
3.4: Optimal Cover Size
There is no clear answer, but it is suggested to keep the size less than 1000px in width and height.
3.5: Groups for Complex Layout
Group elements and rasterize if you want to preserve complex text layouts. Consider that this will be rendered as image, so it’s better to have a text version of the same content as well.
- Select and group elements (Cmd+G);
- While selected go to Object > Object Export Options;
- Click on EPUB and HTML, then check Custom Rasterization;
- Choose PNG if you want a transparent background;
- If you want to have it as a fullpage image check Insert Page Break and select Before and After Image;
- Add a description of the picture as an Alt Text, in this way if the image is not shown people will still be able to know what it is about.
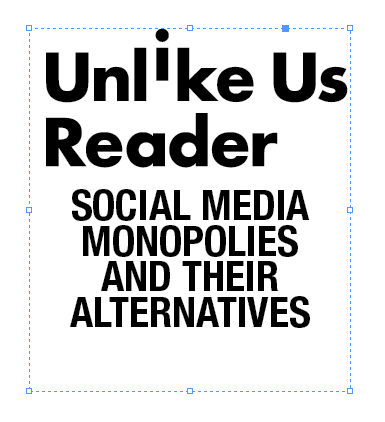
Group for complex text layout
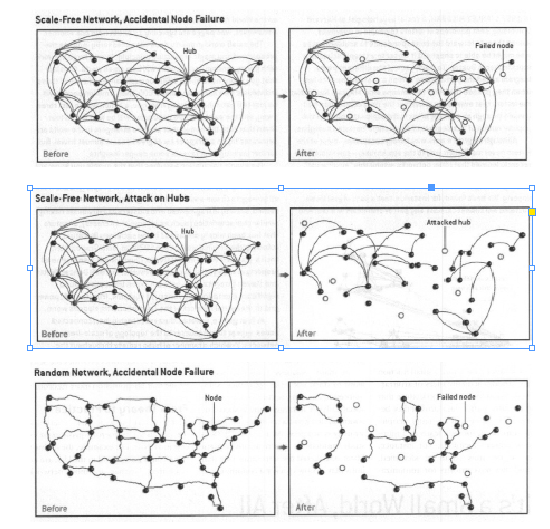
Group for images that are connected
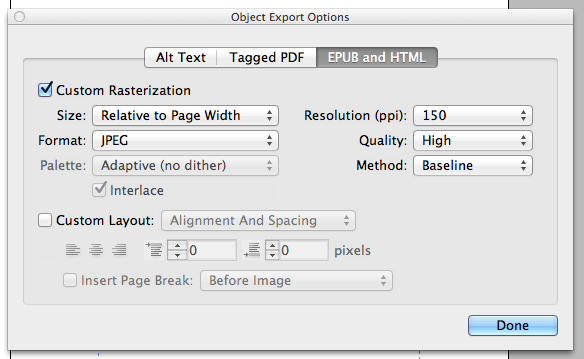
Object Export Options, , Custom Rasterization checked
3.6: Images as Part of the Text
Images need to be inserted in the flow of text in order to be shown at the right place. Otherwise they will be shown after the whole text. There are 2 ways to insert the images:
- Click on the small blue square on the top right and drag it to the point the picture belong in the text;
- Cut the image and paste it while you’re inside the textbox, do the same with the caption.
With the first method there are some known problems: both the picture and the caption will be included in a bounding box (<div>). In order to fix this you will need to work on the HTML and CSS.
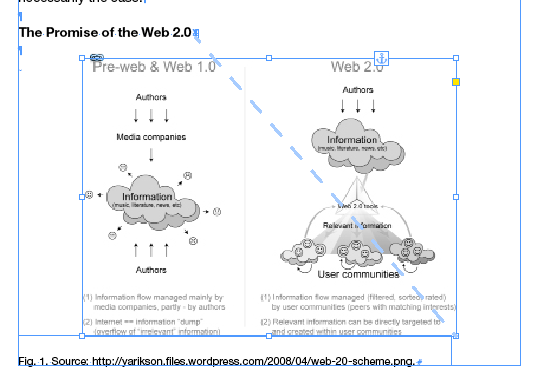
First method: image linked to the text
3.7: Manage the Layout of the Image
Go to Object > Object Export Options to manage the layout of the image.
3.8: Alt Text for Every Picture
As said in 3.6, it’s important to have an Alt Text for every image included in the document.
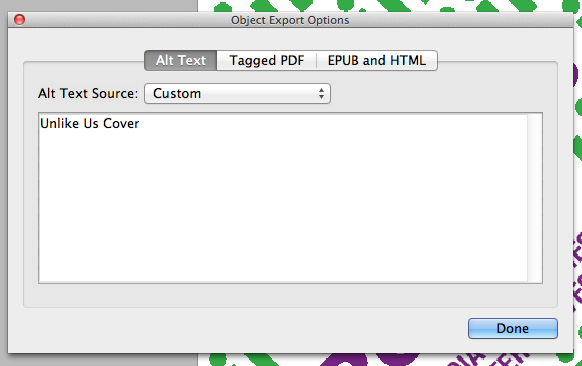
Alt Text box in Object Export Options.
4: Organizing the File for ePub Export
4.1: The Articles Panel
Use the Articles Panel (Window > Articles) to manage the contents and the order of your publication. Add content to your articles by drag and drop content into it. When export to ePub (Cmd+E) set Content Order as Same as Articles Panel to make your changes effective.
When you add a text box to an article, the whole text will be rendered in the ePub even if it’s oversetting in the InDesign document.
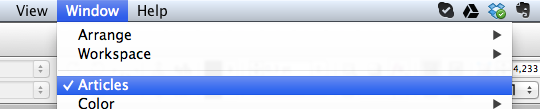
Window > Articles.
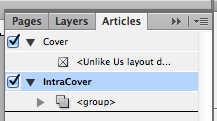
The Articles Panel.
Same as Articles Panel as Content Order in the EPUB Export Options.
4.2: No Tags, Text Repetitions, Etc.
Don’t include in neither in the Articles panel nor in the flow of text unnecessary elements such as tags or repeated text.

A list of tags, not to be included in the articles.
4.3: Split the Document
Splitting the document (in different XHTML files) is important because having a too big document would mean a quite big load for a device in order to quickly navigate it, for instance when one wants to check a footnote and then go back to the text.
In order to split the document, check the Split Document option in the Export Tagging options for each paragraph style you want to break the document, such as the title of the TOC (Table of Contents), or the titles of articles.
Then you will need to select Split Document based on Based on Paragraph Style Export Tags from the Export(Cmd+E) panel.
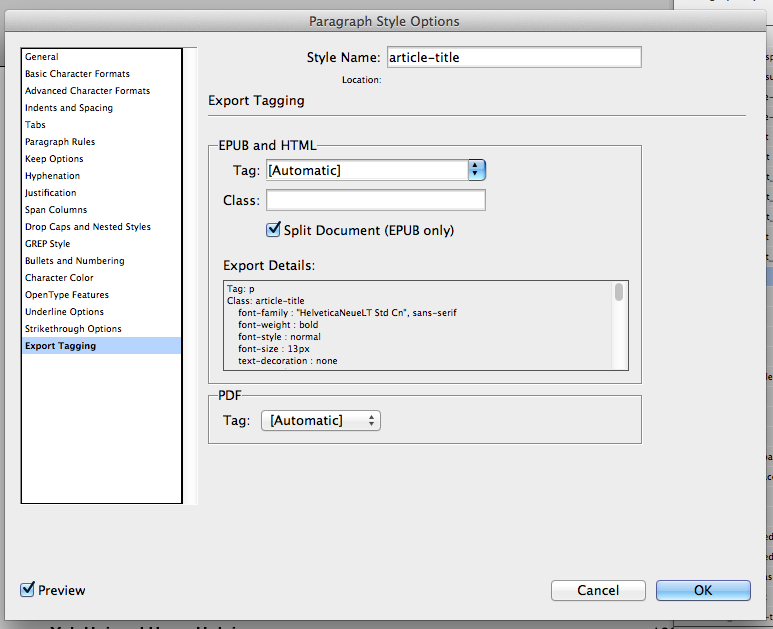
Split Document checked in the Paragraph Style Options
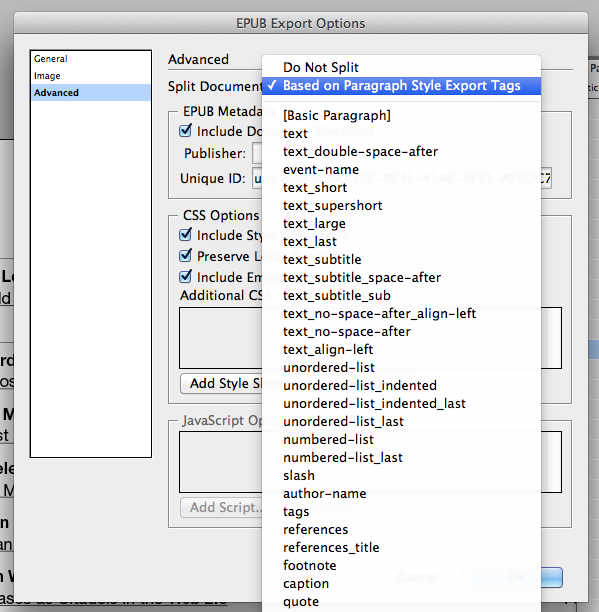
Split Document based on Based on Paragraph Style Export Tags from the Export(Cmd+E) panel.
5: General TOC and Inner TOC
5.1: The General TOC
Any ePub document has a general TOC (Table of Contents) that isn’t included in the actual pages of the document. Even if you don’t do anything, it will be automatically created and it will include a single voice which is the whole document.
5.2: Modify the General TOC
In order to create a general TOC for the ePub go to Layout > Table of Content:
- Include the paragraph style that you want to use as title of the TOC element;
- You can add other styles to create a hierarchic TOC;
- Save the style;
- When you export the ePub choose the style you created as TOC Style.
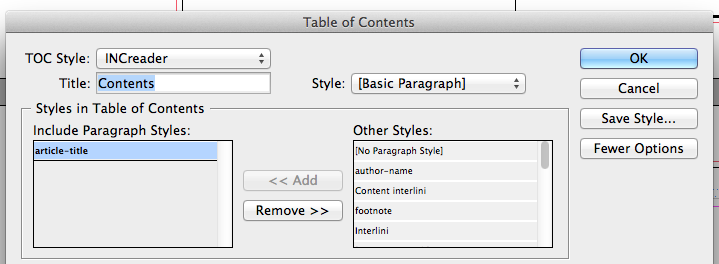
TOC based on article-title as Paragraph Style.
TOC Style selection in the EPUB Export Options.
5.3: The Inner TOC
Even if it’s not mandatory, it could be useful for readers to have an inner TOC, it could be different from the general one: other contents could be added and in a more articulate way.
If there is already one, the TOC prepared for the printed version can be preserved. In this case it’s needed to add an internal hyperlink for each voice (see 7.2).
5.4: No Page Numbers!
Remember not to include any reference to page numbers in the Inner TOC. You could for instance not include them in the Articles panel (check 4.1).
6: Lists and Tables
6.1: Lists
For each list create a paragraph style from Window > Styles > Paragraph Styles. The options specifically referred to lists are the one under Bullets and Numberings.
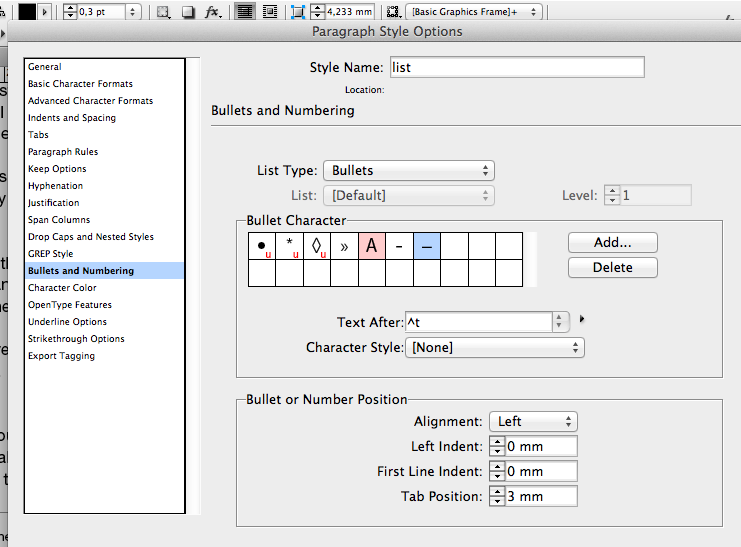
Bullets and Numberings panel in the Paragraph Style Options
6.2: Tables
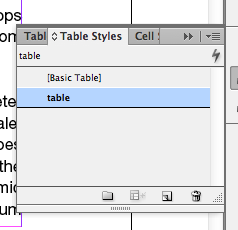
For each table create a table style from Window > Styles > Table Styles. If you have a table with a complex layout is better to rasterize it (see 3.6).
7: External and Internal Hyperlinks
7.1: External Hyperlinks
Add external hyperlinks via Windows > Interactive > Hyperlinks. You can search them looking for “www”, “http”, etc. You can also attribute a specific Character Style to links.
The task can be done automatically using the option Convert URLs to Hyperlinks findable clicking on the right top triangle. Usually this method doesn’t work perfectly because the ”http://” is not automatically added.
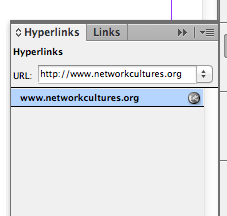
Hyperlinks panel
7.2: Internal Hyperlinks
Add internal hyperlinks to the inner TOC and to the whole document via Windows > Interactive > Hyperlinks. In oder to do so you need to select the text you want your link to go to and select New Hyperlink Destination. Give it a name and save it.
After that you need to go to the text that links to the previous text and to Create a New Hyperlink. It should link to Text Anchor, in particular the one you just created.
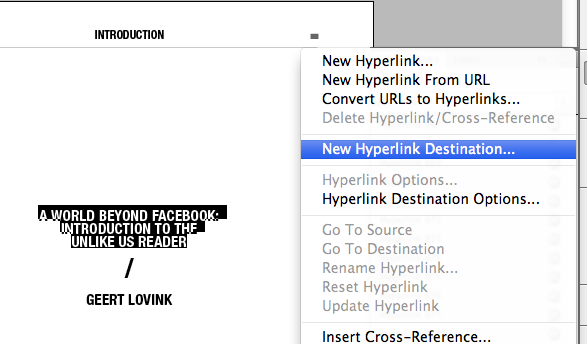
Adding a New Hyperlink Destination
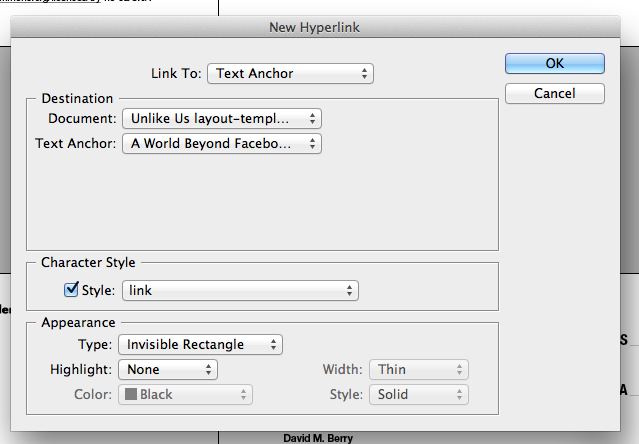
Linking to Text Anchor
8: Cleaning the file and Adding Main Metadata
8.1: No Unused Styles
Delete all the unused styles. You can look for them via Edit > Find/Change. There you need to look for a specific style from Find Format.
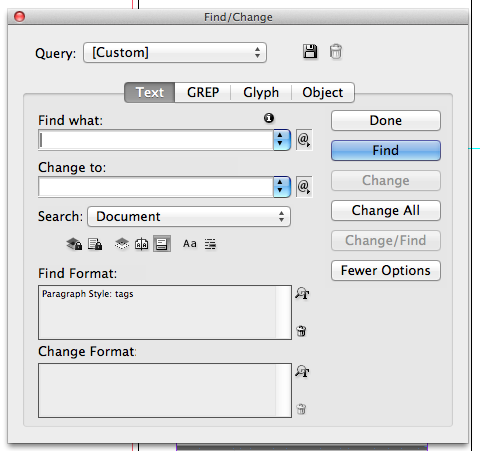
Find/Change panel
8.2: No Local Overrides
As said before (see 2.1) it’s preferable not to have local overrides, in order to keep the ePub clean. Find and remove any local overrides, indicated by the plus sign(+) next to the style. You can use the Show Text Overrides plugin to highlight them.
8.3: No Spaces in Filenames
Make sure that all linked files (and the InDesign file itself) don’t have spaces nor special characters in their names.
8.4: No Useless nor Print-oriented Characters
Make sure there are no double spaces and all the typical formatting errors. Check misspells and useless characters (this should be already done for the printed version).
8.5: No References to the Printed Edition
Make sure there are no references to the printed edition such as “printed in…”, etc. Also make sure there are no references to inner pages (such as “p. 23”), in notes as well. Lastly, make sure that there are no repetitions of the the title in pages such as frontispiece, etc.
8.6: Add links and e-version specific elements to colophon.
You’ll probably mention the publishing house, so add a link to its website. Remember to use an ISBN specific for the ePub. Remember also to add the rights for your publication.

Creative Commons as the rights in the text of the publication
8.7: InDesign Errors and Layout Problems
InDesign automatically detect errors in the document (such as missing fonts). You can find the alert on the bottom left of the software’s window. Make sure there are no problems with pictures and with the layout in general (missing fonts, broken paragraphs, etc).
The Preflight panel showing there are no errors
8.8: Check Both Internal and External Hyperlinks
As above. Make sure that internal links are bidirectional. If you added them automatically, consider that you’ll probably get external links where you don’t want them.
8.9: Assign HTML Tags
By default InDesign will export each paragraph style as a <p> (paragraph in HTML) and characters as <span>. HTML allows to tag elements in a more specific way, hierarchically defining headlines for instance (<h1>, <h2>, etc.).
You can set what tag you want to use and what class from the Export Tagging panel from Paragraph Style Options. It is also useful to merge style that are similar under a single class.
Remember to do so for bold (<strong>), italic (<em>) and superscript (<sup>).

Export Tagging options in Paragraph Style Options
8.10: Metadata
Add the basic metadata (data about other data) from File > File Info, other ones will be implemented directly in the ePub code (see 10.4.1).
- Title;
- Author(s);
- Description;
- Keywords;
- Rights.
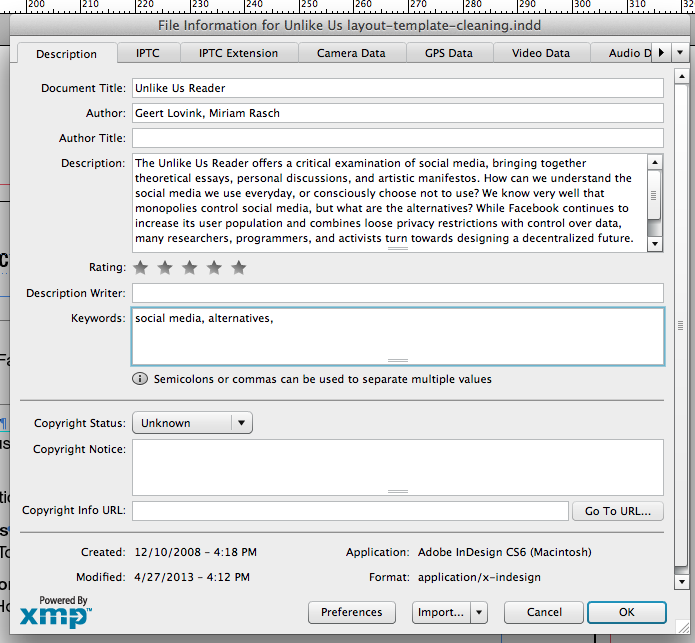
File Info options.
9: Export
9.1: Export Options
You can export from File > Export (Cmd+E).
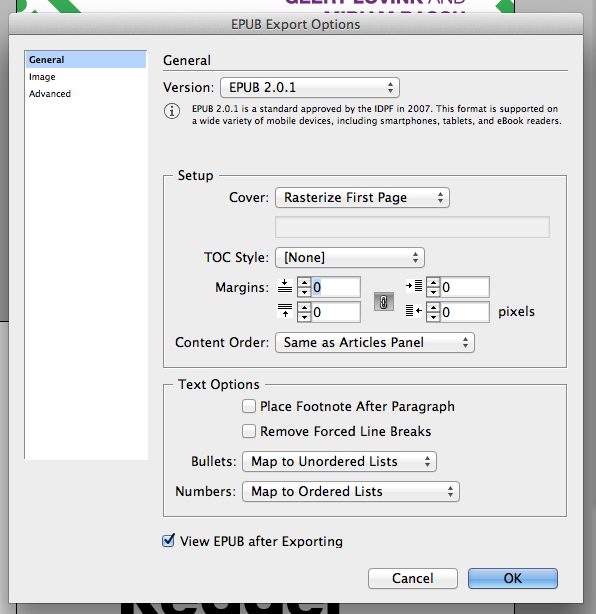
9.2: General Panel
- Even though the official current version for EPUB is 3.0, the de facto is 2.0.1 as it’s widely supported.
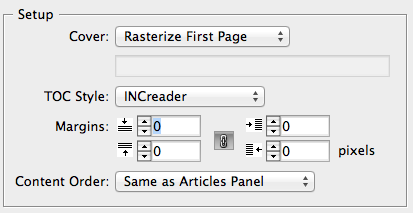
- As said before (see 2.4) there are two possibilities for the cover.
- Choose the style you created before (see 5.2) as TOC Style.
- You can add margins to your page even though most e-readers will overwrite this setting.
- Choose Same as Articles Panel as Content Order.
- The default for footnotes is at the end of the story. If you prefer you can add footnotes after paragraph.
- Check Remove Forced Line Breaks to remove those breaks used for print layout.
- Finally you can map bullet and numbers respectively to unordered and ordered lists.
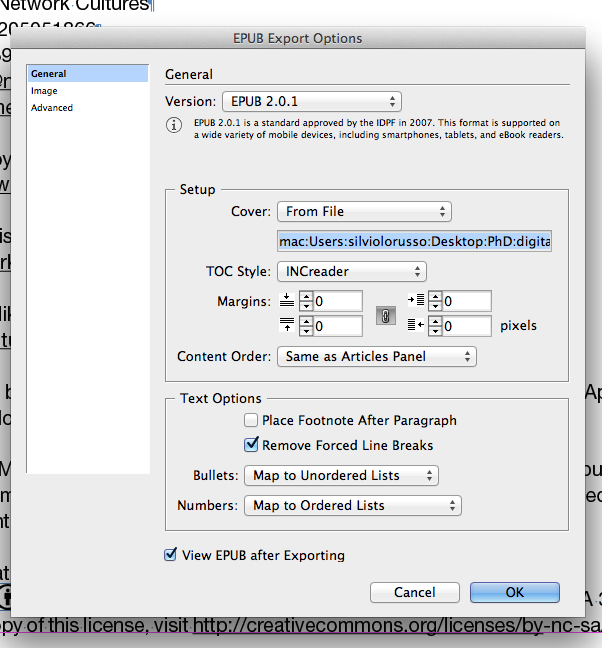
General options in EPUB Export Options
9.3: Image Panel
- Check Preserve Appearance from Layout if you want to keep the way images are cropped, etc.
- Choose Relative to Page as Image Size if you want a value expressed in percentage (e.g. 40% of the page width);
- Choose Image Alignment and Spacing;
- You can insert a page break before, after or both before and after you images;
- Choose JPEG as Image Conversion’s format;
- Choose the Image Quality and the Format Method for your images;
- If you check Ignore Object Export Settings the settings for specific images will be overwritten.
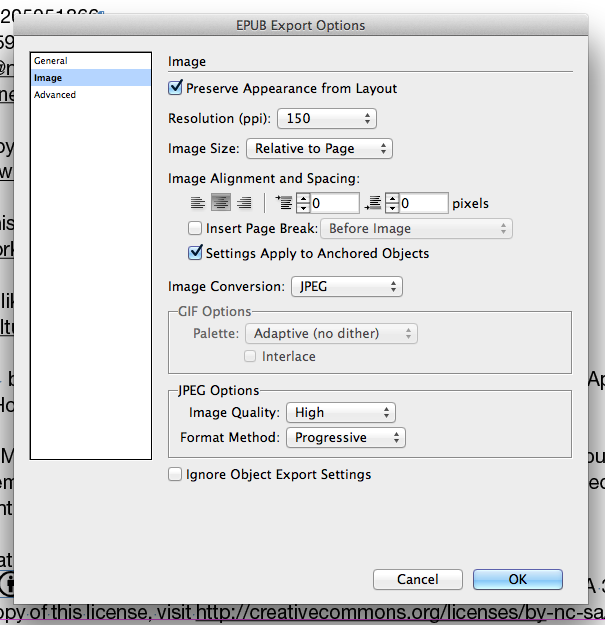
Image options in EPUB Export Options
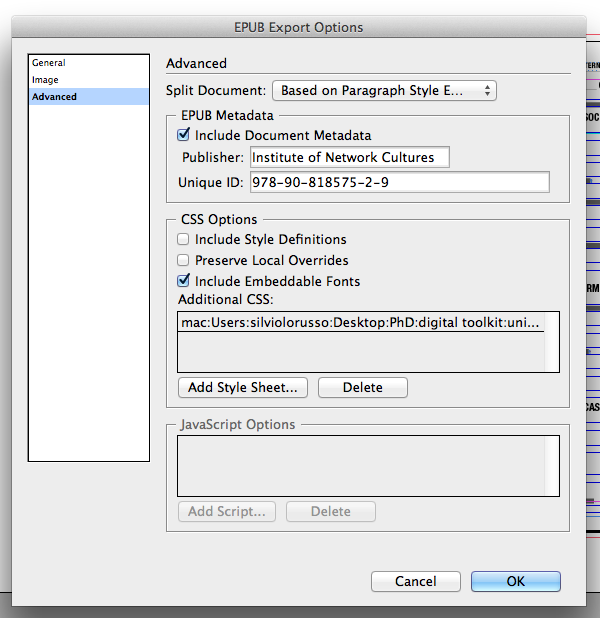
9.4: Advanced Panel
- You can choose to Include Document Metadata;
- Also you can add the Publisher and a Unique ID that could be the ISBN;
- Check Include Style Definitions if you want InDesign to generate a CSS for you;
- You shouldn’t have any local override, so you don’t need to check Preserve Local Overrides;
- Include Embeddable Fonts only if you need them;
- You can add Additional CSS, such as the one attached to this tutorial, this could be useful if you have a whole series with the same style.
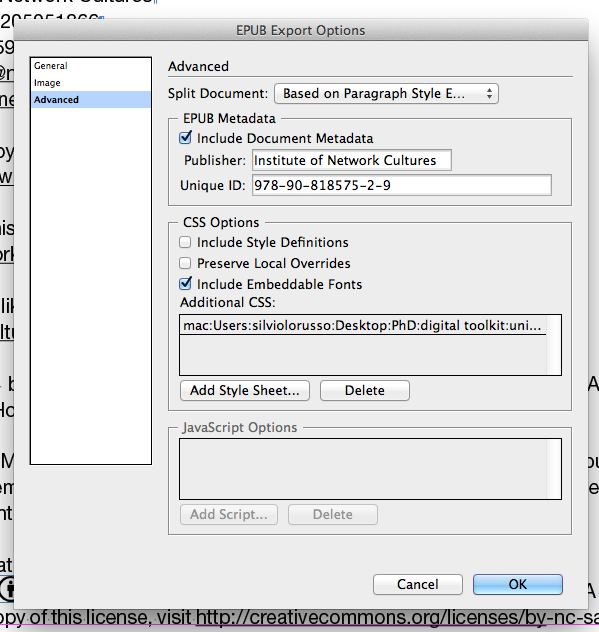
Advanced options in EPUB Export Options
9.5: Validate your EPUB
In order to validate you EPUB you need EpubCheck. You can use either the online validator or the desktop app. Correct the errors if there are.
10: Fix HTML and CSS
An ePub file is basically a ZIP file containing, beside other structure files, all the contents in XHTML documents and the style in one or more CSS files. You can make changes to those files using any Text Editor. Of course you can use editors with syntax highlight such as gedit or Coda.
10.1: Access the ePub
In order to access the inner files of your ePub you need to unzip it. To do so you can use this ePub unzip app. From the same link you can download the ePub zip app that you will need to compact your ePub again after you made your changes.
10.2: Cover
Keith Falgren suggests the following solution as the best practice for the cover. The following code should be included in a specific XHTML file.
<?xml version="1.0" encoding="UTF-8" standalone="no"?>
<html xmlns="http://www.w3.org/1999/xhtml">
	<head>
		<title>Cover</title>
		<style type="text/css">
			body, div, dl, dt, dd, ul, ol, li, h1, h2, h3, h4, h5, h6, p, pre, code, blockquote {
				margin: 0;
				padding: 0;
				border-width: 0;
			}
			p#cover {
				margin: 0;
				padding: 0;
				text-align: center;
			}
			img#cover-image {
				height: 100%;
				max-width: 100%;
			}
		</style>
	</head>
	<body>
		<p id="cover">
			<img id="cover-image" src="image/cover.jpg" alt="Unlike Us Reader"  />
		</p>
	</body>
</html>
10.3: CSS and XHTML
10.3.1: Padding or Margin?
There are two possibilities to space elements vertically:
- using margin (margin-bottom: 3em;);
- using padding (padding-bottom: 3em;);
Apparently they act the same, but actually padding is suggested because it works better when near to the bottom of the page.
10.3.2: Delete Defaults
InDesign will automatically add CSS settings that are not rendered because they are defaults. Examples are:
- margin: 0;
- padding: 0;
- font-style: normal;
10.3.3: Delete Font Colour if not necessary
InDesign will automatically add a colour for the text in the CSS. In several cases this attribute is useless therefore it can be deleted.
10.3.4: Delete Redundant Classes
Such tags as superscripts or italics (<sup>, <em>) automatically get a class from InDesign:
- <sup class=”superscript”>
- <em class=”italic”>
The class can be deleted as long it’s not there to differentiate tags.
10.3.5: Use Page Breaks
Page breaks are useful to break a page before or after a certain element. It’s also possible to avoid that automatic page breaks happen within some elements bound together. The CSS attributes are:
- page-break-before: always;
- page-break-after: before;
- page-break-inside: avoid;
10.3.6: Images with Captions
It’s useful to bind together images with their captions. In order to do so set the images as follows in the XHTML files.
<div class="img">
	<img src="image/Lonneke_image1_fmt.jpeg" alt="Description" />
	<p class="caption">Caption</p>
</div>
10.3.7: No “char-style-override” class
Often InDesign adds a char-style-override class to certain tags. Make sure the class doesn’t add anything and delete it both from the XHTML than CSS files.
10.4: The OPF file
The OPF file is basically divided in 4 parts:
- metadata;
- manifest;
- spine;
- guide.
10.4.1: Metadata
Metadata are data about other data. They are used to provide information about the publication as a whole.
10.4.1.1: Namespaces
InDesign will automatically set the XML namespace to the following:
<metadata xmlns:dc="http://purl.org/dc/elements/1.1/">
Add the following to have the possibility to add futher info in the metadata:
<metadata xmlns:dc="http://purl.org/dc/elements/1.1/" xmlns:opf="http://www.idpf.org/2007/opf">
10.4.1.2: Title
The title should be already included in the following form:
<dc:title>Unlike Us Reader</dc:title>
10.4.1.3: Authors and Roles
Author set in InDesign should be already there. More than one authors could be added and through the opf:role attribute their role could be specified.
<dc:creator opf:role="edt" opf:file-as="Lovink, Geert">Geert Lovink</dc:creator>
<dc:creator opf:role="edt" opf:file-as="Rasch, Miriam">Miriam Rasch</dc:creator>
<dc:creator opf:role="aut" opf:file-as="Barocas, Solon">Solon Barocas</dc:creator>
<dc:creator opf:role="aut" opf:file-as="Bassett, Caroline">Caroline Bassett</dc:creator>
[...]
10.4.1.4: Publisher
The publisher should be already included in the following form:
<dc:publisher>Institute of Network Cultures</dc:publisher>
10.4.1.5: Subjects
Subjects can be added in form of keywords.
<dc:subject>social, media, monopolies, alternatives, internet, web, online, digital, Facebook, twitter, Mark Zuckerberg, unlike us, critique, theory, art, practice, economy, political, philosophy, social sciences, essays, network, privacy, database, web 2.0, individuation, collective, Lorea, Foursquare, design, program, code, graph, business, intervention, resistance, occupy, protest, Diaspora, hackers, hacking, federation, Distribution, centralization, decentralization, architecture</dc:subject>
10.4.1.6: Description
A short description of the content could be added.
<dc:description>The Unlike Us Reader offers a critical examination of social media, bringing together theoretical essays, personal discussions, and artistic manifestos. How can we understand the social media we use everyday, or consciously choose not to use? We know very well that monopolies control social media, but what are the alternatives? While Facebook continues to increase its user population and combines loose privacy restrictions with control over data, many researchers, programmers, and activists turn towards designing a decentralized future. Through understanding the big networks from within, be it by philosophy or art, new perspectives emerge.</dc:description>
10.4.1.7: Date
A date relative to the publication could be added in the following form; month and day are not mandatory.
<dc:date opf:event="publication">2013-02</dc:date>
10.4.1.8: Language
The language of the publication could be added in the following form:
<dc:language>en-GB</dc:language>
10.4.1.9: Rights
Rights of the publication could be added in the following form:
<dc:rights>This publication is licensed under Creative Commons Attribution, NonCommercial, ShareAlike 3.0 Unported (CC BY-NC-SA 3.0).</dc:rights>
10.4.1.10: Identifier
At least one unique identifier must be included. This could be the ISBN number.
<dc:identifier opf:scheme="ISBN">978-90-818575-5-0</dc:identifier>
10.4.1.11: Other Metadata
It is possible to add other metadata.
10.4.2: Spine
The spine defines the linear order of the publication. The linear attribute is useful for items that are part of the publication but are not actual content (such as cover, colophon, etc.)
<spine toc="ncx">
	<itemref idref="cover" linear="no" />
	<itemref idref="unlike-us-reader" />
	<itemref idref="unlike-us-reader-1" />
	[...]
</spine>
10.4.3: Guide (optional)
The guide element identifies fundamental structural components of the publication such as cover, list of illustrations, etc.
10.5: The General Table of Contents: the NCX file
The NCX file structures the TOC that will be automatically displayed by the reading software. InDesign doesn’t allow complex structures, therefore if you need a nested TOC you’ll need to organize it in the following way.
<navPoint id="navpoint-2" playOrder="2">
		<navLabel>
				<text>Theory of Social Media</text>
			</navLabel>
			<content src="unlike-us-reader-3.xhtml#toc_marker-2" />
				<navPoint id="navpoint2" playOrder="2">
					<navLabel>
						<text>The Most Precious Good in the Era of Social Technologies</text>
					</navLabel>
					<content src="unlike-us-reader-3.xhtml#toc_marker-2" />
				</navPoint>
</navPoint>
ID’s should not be repeated more than once and the playOrder attribute should be consistent with the actual order of the XHTML files.